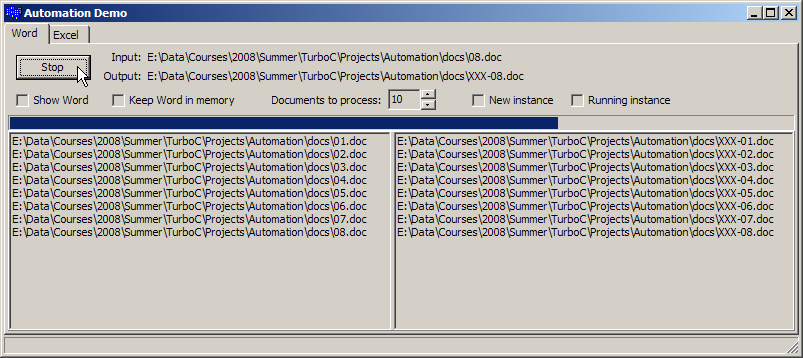
During the first part of the session I showed how automation works by "controlling" Microsoft Word from an application. The demo simply opens up a Word document and saves it under a different name. The code is pretty self-explanatory. I never got the Excel example to run correctly, so there's nothing on that page.
- MainForm.h - The definition of the main form.
- MainForm.cpp - The implementation.
- Project .zip file - Project files to build it yourself. The .zip file includes a /docs folder with some Microsoft Word documents to play with.
- Help File This is a Windows help file from Microsoft. It shows several examples. Unfortunately, all of the examples are in Visual Basic, as that was the main reason for automation. This file was originally downloaded from here.
Note: I'm not sure why yet, but this project doesn't work with the latest IDE. I get an Internal Compiler Error. I think it has something to do with the version of the automation objects that I'm using. It does work with Turbo C++, though, so you can still experiment with it, if you want.
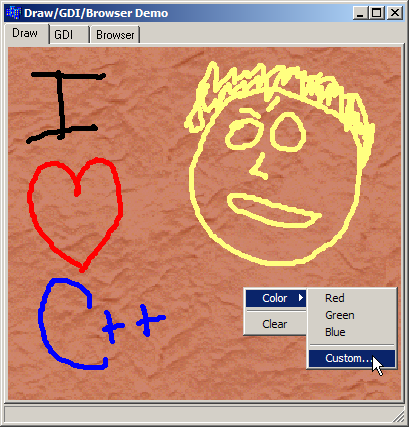
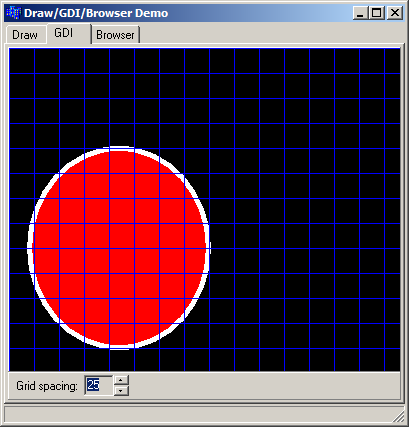
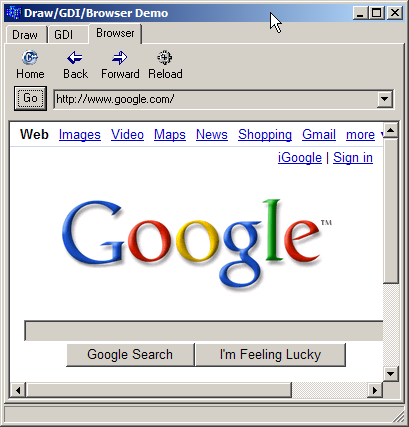
The next application showed a couple of different things. First, I showed how to use the Canvas (TCanvas) property of a component to draw on using GDI calls. The first tab on the application shows a simple drawing program using the mouse as input. The code is pretty straight-forward. The second tab shows some more GDI calls. The code is trivial. The last tab shows how to embed a web browser (Internet Explorer) into an application. The component used is TWebBrowser. Go figure. The code is self-explanatory. This should give you a starting point to add simple web-browsing capabilities to your Windows tools.
- DrawMainForm.h - The definition of the main form.
- DrawMainForm.cpp - The implementation.
- Project .zip file - Project files to build it yourself.
| Drawing Demo wih Popup Menu | GDI Demo | Embedded Web Browser Demo | ||
|---|---|---|---|---|
|
|
|
The last part of the session was spent demonstrating how the IDE provides a very productive environment for GUI development. The IDE may not be up to par with Microsoft's debugger and project manager, but the GUI-related tools are pretty nice. These screenshots and code samples won't really show that.
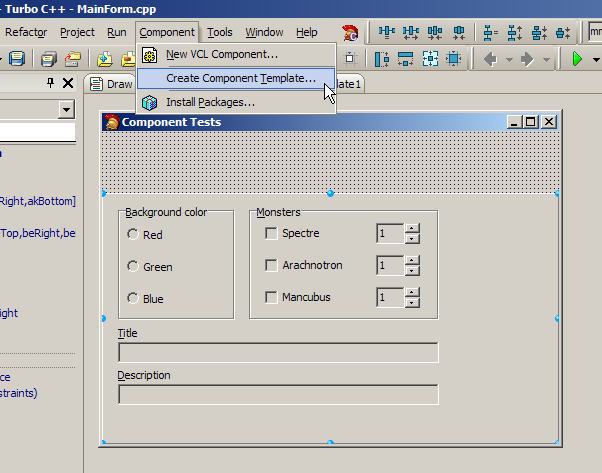
The first thing I showed was a Component Template. I created a simple program that had some components (group boxes, radio buttons, edit boxes, spin edits, labeled edits) on a panel. I added event handlers to the components so that they did something when the user clicked or typed. You can run the application and look at the code to see what's going on. The code is trivial (which seems to be a recurring theme with a good RAD tool).
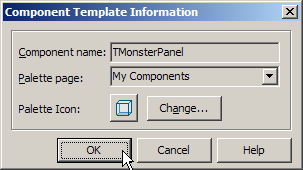
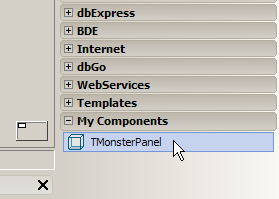
After creating the interface, select the panel, and from the main menu in the IDE choose "Component | Create Component Template...". Give the component a name (e.g. TMonsterPanel) and choose which page in the component palette to put it (e.g. My Components). Optionally, you can choose a custom icon if you'd like. Press OK and you'll see a new My Components category created and a new component in that category named TMonsterPanel. It doesn't get much easier than that to reuse components.
| Create component template | Name the component | New category/component | ||
|---|---|---|---|---|
|
|
|
Once you've created the component template, create a new application ("File | New | VCL Forms Application - C++ Builder"), and drop the TMonsterPanel on the form. Press F9 to compile, link, and run, and you'll see all of the functionality from the component template works in the application. (Again, it doesn't get much easier than this.)
- MainForm.h - The definition of the main form.
- MainForm.cpp - The implementation.
- Project .zip file - Project files to build it yourself.
- There is a short description on creating and using component templates on page 165 (and 1603) of the Help Guide.
The last thing I showed was frames. The component is TFrame and it's a very powerful component. Think of it as a light-weight TForm component. It's a container component that is used to hold other visual components for flexible component and code reuse. One limitation of the component template demonstrated above was that only event handling code was reused. If you had helper functions or classes that were needed by the event handlers, that code would have to be copied manually to each new application. That's not a good form of code reuse. Frames allow you to include not only the components and their associated event handlers, but any other code (functions, classes, data, etc.) that might be needed.
To see how this works, create a new VCL Application like you did above ("File | New | VCL Forms Application - C++ Builder"). Next, add a new frame to the project, "File | New | Other...". In the tree view on the left select "C++ Builder Files", in the right pane click on "Frame", and then click OK. You'll have what looks like a Form, without any borders. This is what a TFrame is. Now, drop a TMonsterPanel (that you created above) onto the frame. Essentially, you're done!
Well, there are a couple of things that need to be modified since applications are going to use the TMonsterFrame instead of the TMonsterPanel. If you look at the code from the application above that used the component template, TMonsterPanel, you'll see that the event handlers change attributes of the main form (this->Color and this->Caption). This works fine because the this pointer is the main form. However, in the TMonsterFrame, the this pointer refers to the TFrame itself, not the main form (TForm) that contains the frame. (Think about it.)
Since we want to be able to use the TMonsterFrame with any form of any application, we need to tell the frame what form it should work with. This is easily done by adding a public property or field to the TMonsterFrame class. This field will simply be this:
and in the application where the TMonsterFrame is used, add this to the FormCreate method:public: TForm *theMainForm;
Now, the frame will work for any application. See the code for details. (It's all trivial.)frameMonster->theMainForm = this; // assumes the name of the frame is frameMonster
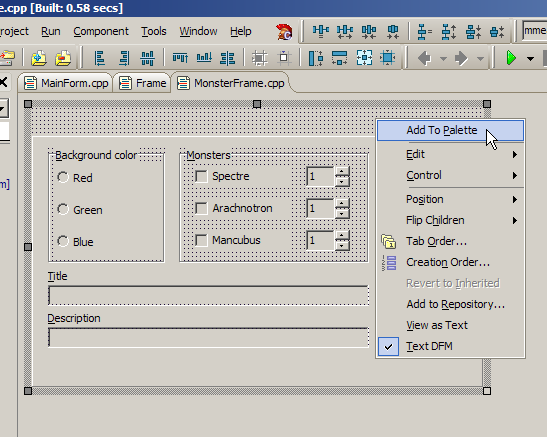
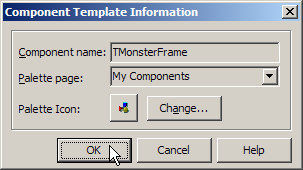
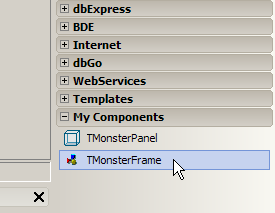
In order to make the new TMonsterFrame easily available for other applications, you should add it to the component palette. This is done similarly to how you added a component template. For frames, right click on the frame and choose "Add To Palette". You will be prompted for a name and a component page where to put it.
| Add frame to component palette | Name the component | New category/component | ||
|---|---|---|---|---|
|
|
|
- MainForm.h - The definition of the main form.
- MainForm.cpp - The implementation of the main form.
- MonsterFrame.h - The definition of the Monster frame.
- MonsterFrame.cpp - The implementation of the Monster frame.
- Project .zip file - Project files to build it yourself.
- There is a short description on working with frames starting on page 1603 of the Help Guide.