Notice: If you are simply wanting to have an environment where you can build
C/C++ programs and run Valgrind (memory debugger) to detect bugs, you should
use these instructions, as they are much easier and
you will have all of the capabilities you need.
Setting Up Windows Subsystem For Linux (WSL) on Windows 10
The computers at Digipen already have WSL and Ubuntu installed so you can
just jump down to Setting Up WSL. If you want to set it
up on your own computers, you have to start from the top of this page. Also,
at the time that this document was created, the latest version of Ubuntu was
18.04. There are likely newer versions available now. However, the version of Ubuntu
that you install will make no difference.
Topics:
Disclaimer:
These instructions were written in 2019 and worked for the current version of
Windows 10 (1903, I believe). With the latest version of Windows 10 (I love always
having to qualify Windows 10 with a version... WTH does the '10' mean?), these
instructions for Downloading and Installing WSL and Ubuntu may not work
any longer. However, there are instructions on Microsoft's website that will
work.
Windows Subsystem for Linux Installation Guide for Windows 10
Realize, that Microsoft is notorious for broken links. If the link above no longer
works, you're on your own (and Google is your friend).
The Installing Software in Linux section below will still
work, regardless of any problems setting up WSL.
- Before installing any Linux distros for WSL, you must ensure that the
"Windows Subsystem for Linux" optional feature is enabled. To do that,
open PowerShell as Adminstrator and run this command:
Enable-WindowsOptionalFeature -Online -FeatureName Microsoft-Windows-Subsystem-Linux
After running the command, reboot the computer. It will install more things during the shutdown
and restart phase.
- The next step is to download a Linux distribution. The recommended distribution is Ubuntu 18.04 LTS.
Open PowerShell as Administrator again and run this command:
Invoke-WebRequest -Uri https://aka.ms/wsl-ubuntu-1804 -OutFile Ubuntu.appx -UseBasicParsing
This will download the distribution. The file is called Ubuntu.appx and is about 225 MBs. It may take
a few minutes to download depending on the network speed.
- Now, it's time to install the distribution. In PowerShell, run this command:
Add-AppxPackage .\Ubuntu.appx
And that's it! Ubuntu 18.04 LTS has been installed and is ready to be enabled and setup. That's
the topic of the next section.
More details:
- Once WSL and a Linux distribution has been downloaded and installed, it is ready
to be enabled for each user.
Type ubuntu in the Start Menu and if it is installed you should see
something like this:

- Run the app called Ubuntu 18.04 LTS from the Start Menu and it will
open a command window. DO NOT run this as Administrator.

- After a few minutes it will prompt you to create a username and password. Even though
it says you can create any username and password, DO NOT DO THAT! Use your Digipen
username and password. It will be much easier to remember. If you choose a different
username and password and you forget either one, you CAN NOT get it back. You will have
to delete your entire account and start over. The IT dept. has absolutely no way to help
you.
Congratulations! You are now running Linux (inside of Windows)! You can tell
because the command prompt has changed:

If you are familiar with Linux you can skip the rest of this brief tutorial and
just start having fun with it! However, if you are new to Linux, you can continue
on and see how to get a build environment and memory debugger setup.
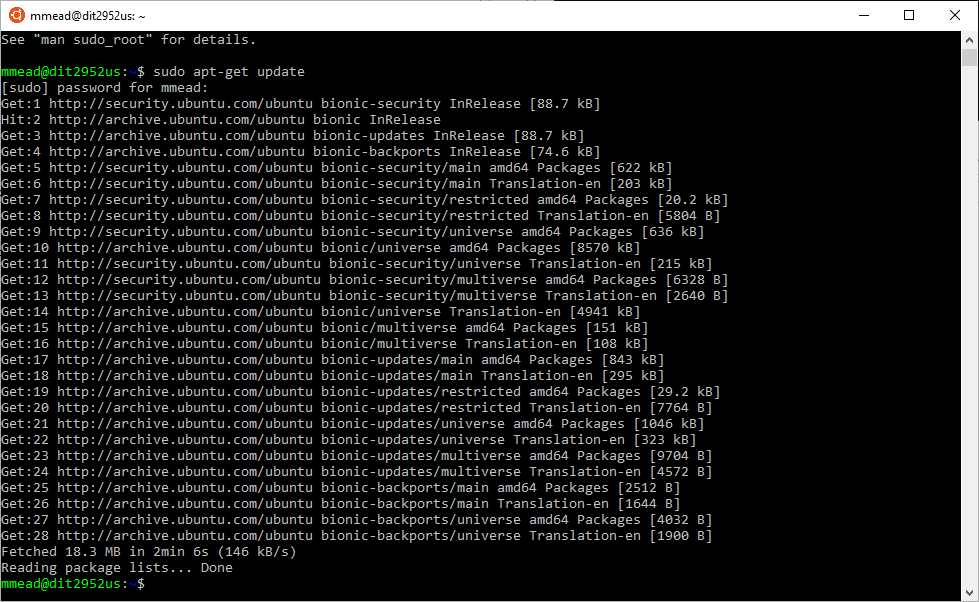
- The next step is to update some things in Linux so you can install some software. Run
the command:
sudo apt-get update
It will prompt you for your password (the one the just created, which is the same
as your Digipen Windows password, right?) It will run for a minute or so and then
tell you it's done:
- The next step is to make sure all of the installed software is up to date.
To do that, run this command:
sudo apt-get upgrade
It will figure out which packages (apps) have been updated and then download
and install them. Depending on how out-of-date your system is, this could take
no time (everything is up to date) or many minutes (lots of outdated software).
The output (not shown) will look something like the pictures shown in step #3
and #4 below.
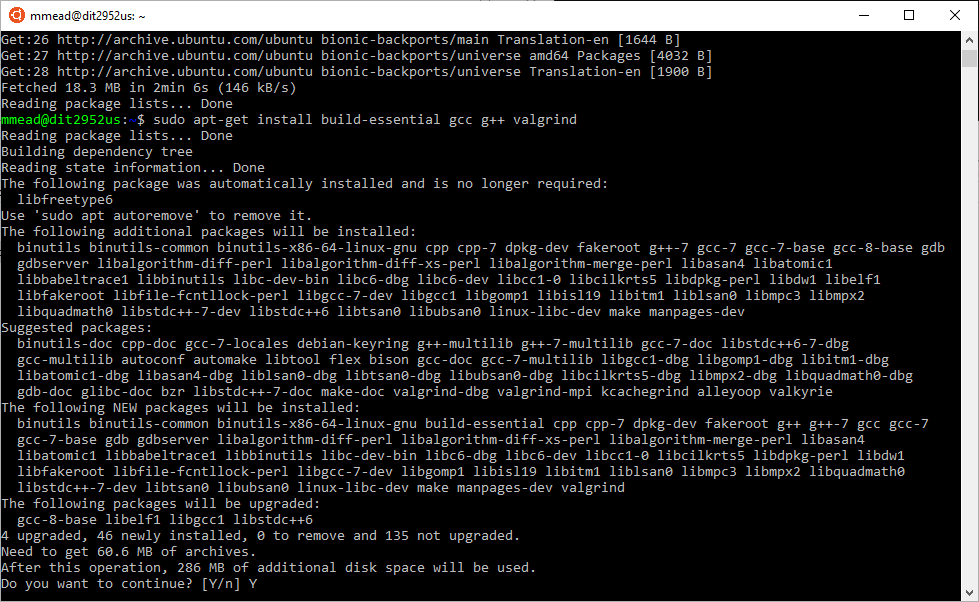
- Ok, now you're ready to install some development tools. Run this command next:
sudo apt-get install build-essential gcc g++ valgrind
This will install the GCC C compiler, C++ compiler, Valgrind (the memory debugger)
and some other dev tools (make, etc.). It will take a few minutes.
- In a few minutes you'll see something like this when it's done:
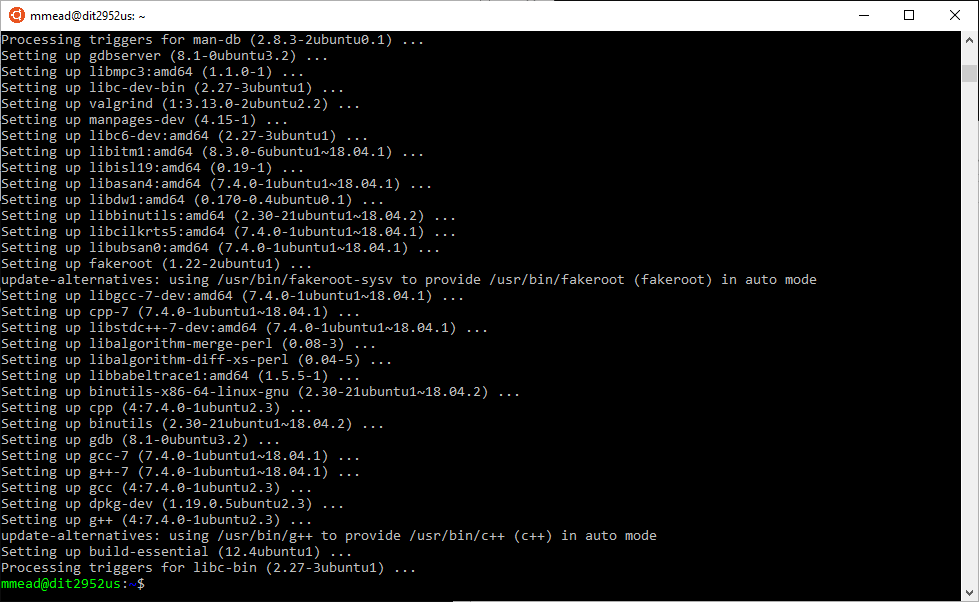
Congratulations! You've just setup a development environment, installed a C
and C++ compiler, and installed a memory debugger!
- Ok, so now you want to test things out to see if you've set up everything
correctly. Let's use the WarBoats program to test it out. In Windows, navigate to
your WarBoats project. (If you don't have a WarBoats project, any project that has dynamic
memory allocation will work.) You can even make a simple one-liner C program that
forces a memory leak:
#include <stdlib.h>
int main(void)
{
  malloc(123); /* Leaks 123 bytes of memory */
  return 0;
}
Open up a command prompt in the WarBoats (or whatever project) folder. Now,
you're at the command line, but you are still in Windows.

- Type wsl (that's lowercase WSL) on the command line and you will be switched over to Linux.
Again, it's easy to see because your command prompt has changed:
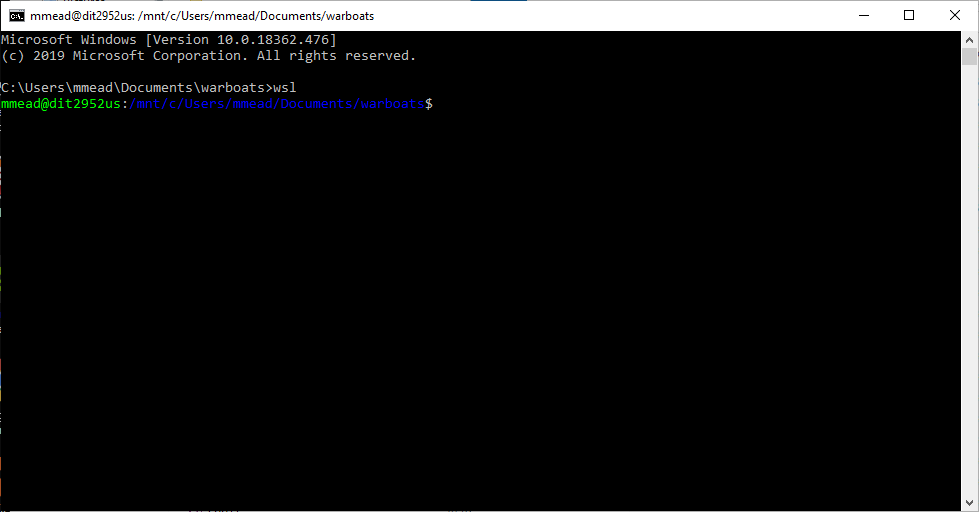
Remember the command wsl as it is the command you use to switch into Linux. You
will still be in the same directory as you were in Windows (which is very convenient).
To get out of Linux and return back to Windows, simply type exit while you're
in Linux. If you happen to type exit while you're in Windows, it will close
the command prompt and you'll have to reopen it.
Notice the directory you're in. My example shows: /mnt/c/Users/mmead/Documents/warboats
When you're in Linux, the entire C drive for Windows is located in /mnt/c.
Also notice that directories are separated by a forward slash / in Linux.
Windows uses a backslash \.
- In case you have some old Windows files hanging around, run make clean
and then make to build the project as a Linux project. The binary files
(e.g. executables, object files) from Linux and Windows are incompatible, so you must rebuild
them when switching between Windows and Linux. Trivial to do with a makefile, of course.
(You are using makefiles, right?)
Once you've built the project, execute it to make sure it actually works. Remember,
in Linux and Mac, you run the program like this with a leading dot and forward slash:
./warboats 1
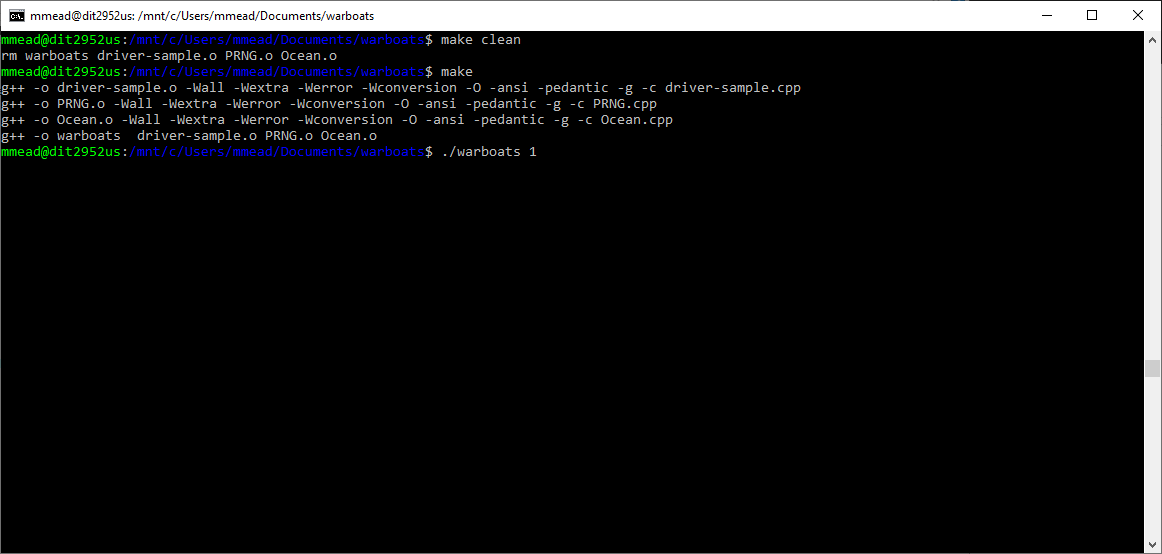
The next screenshot shows you what happens after running the program.
- This shows the last few lines of output from the first test:
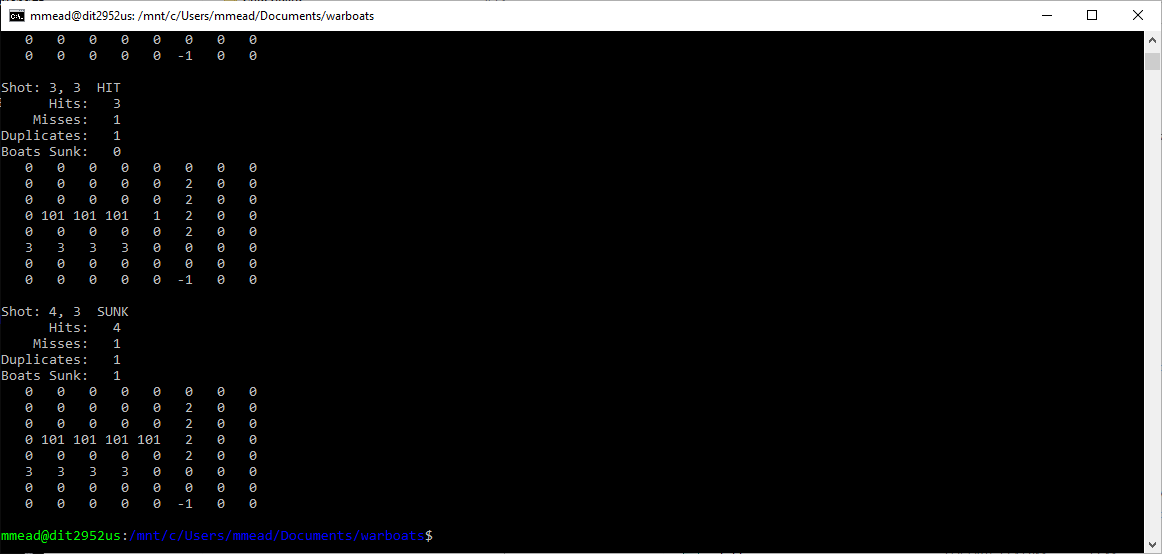
Ok, it looks like things are working. Now, let's add a memory leak!
- Load your file (Ocean.cpp for WarBoats) into any text editor and add
a memory leak. I've just removed the delete (freeing memory) in the
DestroyOcean function. In the code below theOcean is a pointer
to a dynamically-allocated structure. Failing to delete that will cause
a memory leak.

- Run make again (not shown) to rebuild with the leak. Then, run this
command:
valgrind -q --leak-check=full --show-reachable=yes ./warboats 1 > /dev/null
This will cause Valgrind to run WarBoats (the first test only) and to look for memory problems.
The end of the command:
> /dev/null
suppresses the output from WarBoats (redirects it to nowhere). At
this point, we don't care what the output is because we just want to see Valgrind's
output. We can see that Valgrind found the memory leak:
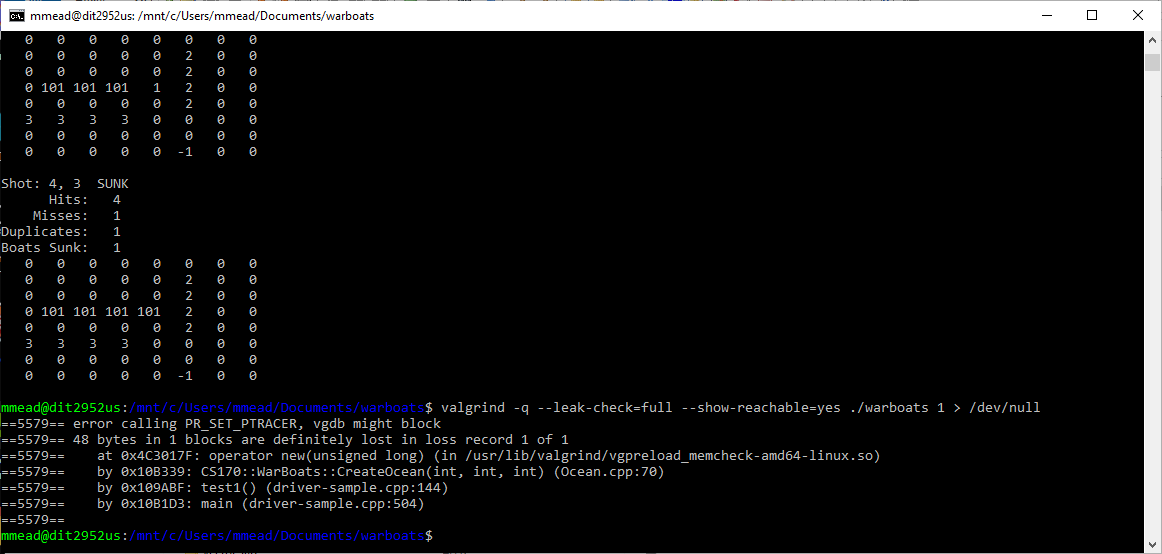
It says that 48 bytes were leaked. This is simply because that's the sizeof(Ocean).
Here are the relevant structures to see for yourself. (There are 4 bytes of padding for alignment in
the Ocean struct)
  //! Statistics of the "game"
struct ShotStats
{
  int hits;       //!< The number of boat hits
  int misses;     //!< The number of boat misses
  int duplicates; //!< The number of duplicate (misses/hits)
  int sunk;       //!< The number of boats sunk
};

  //! The attributes of the ocean
struct Ocean
{
  int *grid;        //!< The 2D ocean
  Boat *boats;      //!< The dynamic array of boats
  int num_boats;    //!< Number of boats in the ocean
  int x_quadrants;  //!< Ocean size along x-axis
  int y_quadrants;  //!< Ocean size along y-axis
  ShotStats stats;  //!< Status of the attack
};
You can ignore the error on the first line of output:
error calling PR_SET_PTRACER, vgdb might block
as it probably won't affect any of you. If you're interested, you can find some information on that error
here or Google for more.
- Now, go back to the text editor and fix the leak (not shown). Then, run make
again, and then run valgrind again. The leaks are gone!

Disclaimer: As was stated at the top of this document, newer versions of Windows 10 may not work with the instructions
below so you may have to just Google the information.
In order to run GUI applications you will need to install an XServer. There are various
XServers available for Windows and I'm not going to tell you which is the best. (I really
don't know as I don't use Windows). However, here is one suggestion:
VcXsrv - An X Server for Windows
It is a free and open source native X server for Windows.
- You simply download it
and install it just as you would any Windows application. This should put an application
icon on the Desktop called XLaunch:

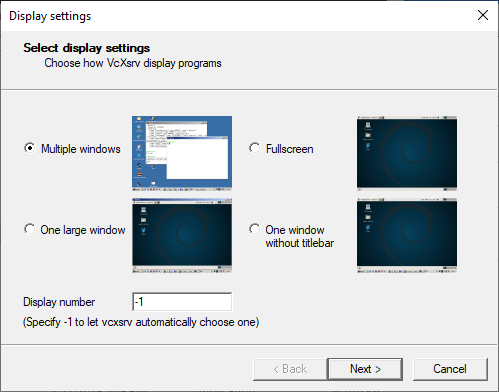
- Double-clicking this will start the XServer. It will ask you a few questions. I
suggest you just take the defaults that are presented to you (unless you know
better about what's going on).
Select Multiple windows:
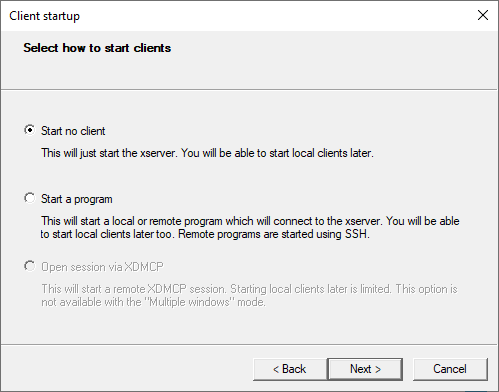
Start no client:
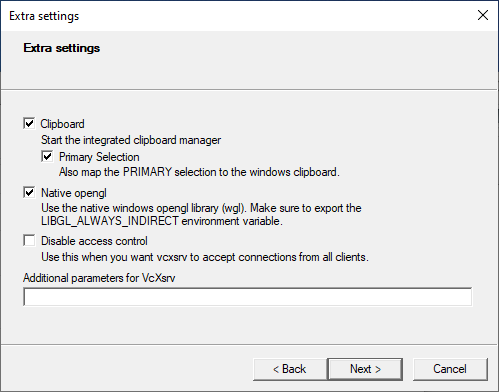
Choose the Clipboard and Native opengl. I'm not really sure how the Native opengl
works because I didn't see any difference with or without that when running an
OpenGL app. (But, I was running WSL inside a Windows VM inside of Linux!)
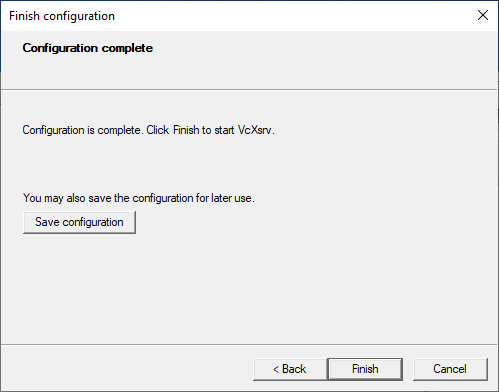
You can save the configuration, if you want, and then click Finish.
- Ok, now the XServer is running. You won't see anything visible except for an icon
(the big X) in the system tray:

- Now, let's do a quick test. A quick way to test the XServer is to run glxgears. You must
be in Linux (WSL) at the command prompt to do this. In order for the command prompt (console)
to be able to use the XServer, you must type this right after the console is opened:
export DISPLAY=localhost:0.0
Now graphical applications will know how to connect to the XServer.
Tip: If you want the console to be able to display GUI applications automatically
(without having to type the export command everytime), add the export command to the bottom of
your .bashrc file. (It's in /home/USER/.bashrc, where USER is your username.)
Now, everytime the console is opened, it is able to support GUI apps.
With that out of the way, let's test it with glxgears. First install it:
sudo apt install mesa-utils
Then run the command:
glgears
In the upper left corner of the screen you should see a small window that looks like this:
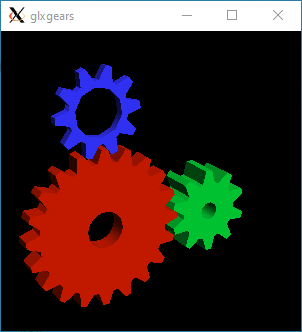
Let the gears spin for about 20 seconds or so and then close the window.
This is the output you'll see (or similar) in the console window where you ran it from:
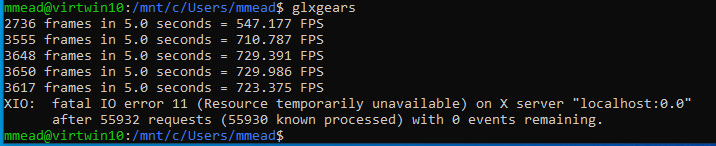
You can ignore the error, as that is the message you get when you stop the program.
It's telling you that you are getting a little over 700 frames per seconds (FPS), which
means that the XServer is working.
- To stop the XServer, just right-click on the icon in the tray and choose Exit...
Now if you try to run glxgears again, you'll get the message:
Error: couldn't open display localhost:0.0
- If you want the XServer to run automatically every time you boot into Windows,
you can add it to Windows Startup. See
this document on how to do that.
-
Windows Subsystem for Linux Documentation - This is from Microsoft
-
How to open a PowerShell as Adminstrator.
- Installing WSL on Windows 10
- Downloading Linux distributions
- VcXsrv - A free and open source X Server for Windows
-
Startup apps - How to configure apps to start automatically when Windows is booted.
- Disable the annoying "chimes" in bash on Windows 10